This kefir-brined chicken is juicy and bursting with flavour, and it couldn’t be easier to make! Learn the basics of brining so you can put this easy and wholesome sheet pan dinner on the table this week.

First off, if you can’t get your hands on milk kefir, don’t worry about it. You can easily swap the kefir out with buttermilk if that’s easier for you to get your hands on.
I just happen to be swimming in milk kefir because I make my own at home.
Kefir, by the way, is a fermented milk beverage that’s basically a drinkable version of yogurt.
Boasting more probiotic power than yogurt, it’s easy for the body to digest and is good for gut health.
This post may contain affiliate links, meaning that if you choose to purchase something after clicking on one of the links in this post, I may earn a small commission at no additional cost to you.
Plus, it’s a great way to sneak in a daily dose of cod liver oil for those omega-3’s! You’ll have to check out my post on making milk kefir to get the scoop on that story.
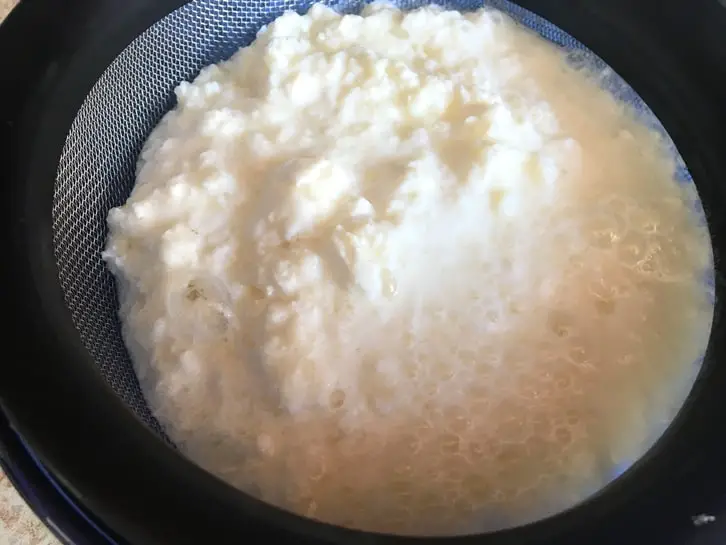
This is milk kefir. The lumpy stuff is the live culture that converts the milk into kefir.KEFIR-BRINED CHICKEN TUTORIAL VIDEO
There’s not very much that goes into making this simple sheet pan dinner, but here’s the recipe video if you want a tutorial. It’s one of my silent-film mode videos, so if you like what you see, be sure to subscribe to my YouTube channel!
THE CHICKEN
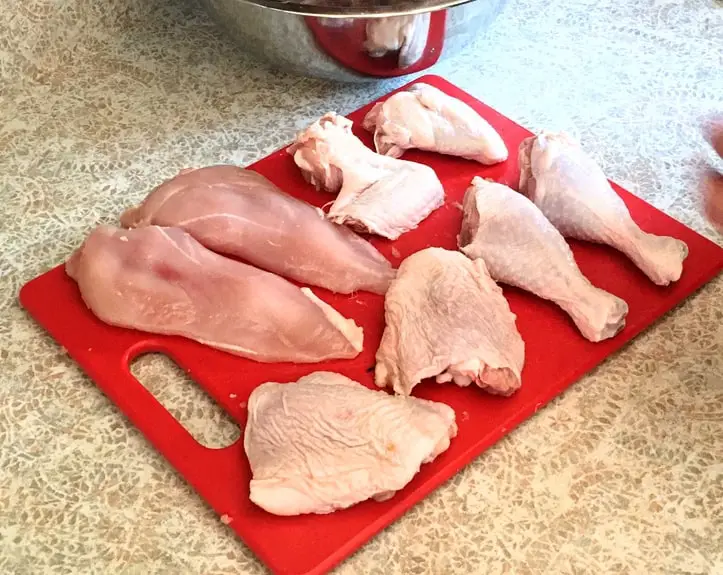
For this recipe, I like using thighs, drumsticks and wings, but use whatever you like. I almost always buy whole chickens because you get more bang for your buck and can really stretch your dollar. Plus, there’s the carcass that gets turned into homemade chicken broth, which translates to even more cost savings.
If you go the route of buying a whole chicken, quarter it up when you get home and save the breasts for another recipe, like tequila lime chicken quesadillas. I have a tutorial on how to quarter a chicken if you’ve never done it before. It’s a culinary skill all frugal kitchenistas should have!
The other route is roasting a whole chicken after brining it in the kefir milk overnight. Just pop that baby in a large ziplock bag and flip it over once or twice while it’s in the fridge. Just use a roasting pan instead of a sheet pan!
THE SALT
Did you know that salt is one of the secrets behind making excellent chicken? It’s true. That’s why brining is such a powerful move, because the chicken is taking a luxurious salt bath, soaking it all up.
The salt permeates every part of the chicken and it’s for this reason that you want to be careful not to let it sit in the brine for too long, otherwise, it will be too salty.
I know this step might seem like a pain in the butt, especially if you’re looking to make this tonight. I’m telling you though, it’s going to be SO much better if you let yourself plan ahead for tomorrow.
Before washing up the dinner dishes, mix up the brine, get it on the chicken, and then walk away until the following evening. You can also get it in the brine before leaving for work. I’ve done eight-hour brines before and everything always turns out just fine.

THE VEGETABLES
This is where the sheet pan dinner comes in! Poke around your root cellar (or, you know, your fridge) to see what you have on hand.
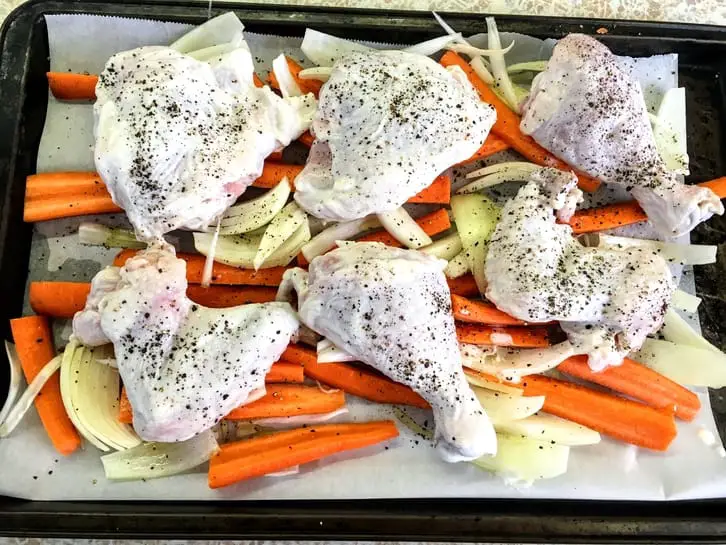
Wash, peel and chop up sweet potatoes, carrots, onions, turnips, squash or cauliflower. I normally do carrots and onions because they’re the easiest. Bear in mind that your veggies will be in the oven for close to an hour, so don’t use anything that’s too delicate to hold up to a high oven temperature.
Once your veggies are arranged on the baking sheet, drizzle them in olive oil and sprinkle them with salt and fresh ground pepper. You can also toss them in oil with herbs, salt and pepper before adding them to the pan. Play with the herbs and spices. This is your sheet pan dinner, so have a bit of fun with it!
PULLING THE CHICKEN
This next step is SUPER IMPORTANT to get a beautiful, juicy chicken.
Did the all-caps get your attention? Good.
The secret to getting perfect chicken lies in pulling the chicken from the fridge one hour before it goes into the oven.
An hour is enough for the chicken to shake off its chill and start coming down to room temperature.
Normally this kind of practice is a no-no in the kitchen because we want to keep meat and eggs out of the danger zone (the temperature range where bacteria grow like crazy), but it’s only for an hour. The chicken is cold and it’s in brine, so the salt inhibits bacteria growth.
Why go to all this trouble though?
When we put a cold chicken in the oven, it leads to uneven cooking. The skin heats up and gets nice and crispy, but the inside warms up instead of cooks.
This means the chicken stays in the oven longer. By the time the chicken is cooked at 165ºF/74ºC the outside is dry and the juices have either leaked out or evaporated.
The moral of the story? Pull your chicken from the fridge as soon as you get home. Put on some music, pour a glass of wine, and prep the veggies while you pass the time.
ROASTING THE KEFIR-BRINED CHICKEN
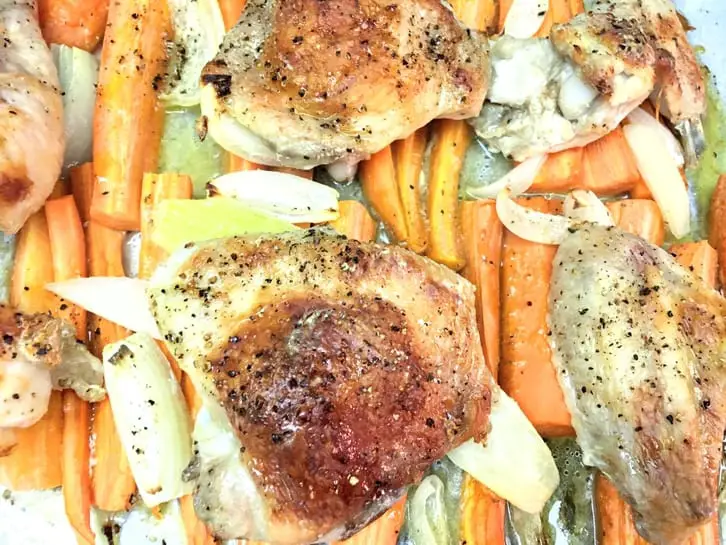
Once the chicken has had time to warm up, pre-heat the oven to 425ºF/218ºC. If you haven’t added your vegetables to the baking sheet, do that now, because you will be perching the chicken right on top of them.
Working piece by piece, scrape off as much kefir as you can using only your hands. Arrange the chicken on top of the vegetables and wash yourself up.
When the oven is good and hot, pop the chicken and veggies in for a twenty-minute bake. After the timer goes off (always set a timer), rotate the pan and turn down the heat to 400ºF/204ºC. Roast the kefir-brine chicken for another 30 minutes.
By this time, the chicken should be ready. If you want to test for doneness, you can poke a fleshy bit with a knife. If the juices run clear, it’s ready. Alternatively, you can stick in a food thermometer to see if the chicken reads 165ºF/74ºC. Let the chicken rest for a couple of minutes, then serve. Bon appetit!
THANK YOU FOR DROPPING BY THE KITCHEN!

I really hope that you enjoy this recipe as much as I do. This kefir-brined chicken is so flavourful, tender and juicy that it’s hard not to love it. I just hope you let me know how it goes by leaving a comment and a rating in the section below! If you’re looking for other milk kefir recipes, I have a few linked below that you can check out. See you soon! Also, need another side to go with the chicken? Try frying up some good old-fashioned skillet potatoes!
GET MORE MILK KEFIR RECIPES HERE
KEFIR-BRINED CHICKEN INGREDIENTS
2 of each: thighs, drumsticks, wings OR 1 whole chicken OR whatever you want
2 cups milk kefir
1 tbsp kosher salt OR 2 tsp sea salt
1-2 pounds of fresh vegetables (ie. sweet potatoes, cauliflower, carrots, onions, squash, etc).
a drizzle of olive oil
salt and pepper
KEFIR-BRINED CHICKEN INSTRUCTIONS
Mix the salt and milk kefir together.Place the chicken in a ziplock bag or a medium bowl and pour in the brine, ensuring that the chicken is covered.Allow the chicken to sit in the brine for a minimum of 8 hours, or overnight.An hour before roasting, remove the chicken from the refrigerator to let it come to room temperature.Preheat the oven to 425º/218ºC.While the oven heats, prepare the vegetables–washing, peeling and chopping in large chunks. Arrange them on a parchment-lined baking sheet.Drizzle the vegetables with olive oil and season with salt and pepper.Scrape off as much brine as possible from the chicken using only your hands. Arrange the chicken over the vegetables and generously sprinkle with fresh ground pepper.Roast for 20 minutes. When the timer goes off, rotate the pan and turn down the heat to 400ºF/204ºC.Bake for an additional 30 minutes. The chicken is done when the juices run clear after poking it with a knife, or when it reads 165ºF/74ºC on a thermometer.
PRINTABLE KEFIR-BRINED CHICKEN RECIPE CARD

Kefir-Brined Chicken Sheet Pan Dinner
Equipment
- Baking sheet
Ingredients
- 2 of each: thighs, drumsticks, and wings OR whatever combination you like
- 2 cups milk kefir
- 1 tbsp kosher salt OR 2 tsp sea salt
- 2 tsp sea salt
- 1-2 pounds of fresh vegetables ie. sweet potatoes, cauliflower, carrots, onions, squash, etc.
- a drizzle of olive oil
- salt and pepper
Instructions
- Mix the salt and milk kefir together.
- Place the chicken in a ziplock bag or a medium bowl and pour in the brine, ensuring that the chicken is covered.
- Allow the chicken to sit in the brine for a minimum of 8 hours, or overnight.
- An hour before roasting, remove the chicken from the refrigerator to let it come to room temperature.
- Preheat the oven to 425º/218ºC.
- While the oven heats, prepare the vegetables–washing, peeling and chopping in large chunks. Arrange them on a parchment-lined baking sheet.
- Drizzle the vegetables with olive oil and season with salt and pepper.
- Scrape off as much brine as possible from the chicken using only your hands. Arrange the chicken over the vegetables and generously sprinkle with fresh ground pepper.
- Roast for 20 minutes. When the timer goes off, rotate the pan and turn down the heat to 400ºF/204ºC.
- Bake for an additional 30 minutes. The chicken is done when the juices run clear after poking it with a knife, or when it reads 165ºF/74ºC on a thermometer.
Notes
- Brine the chicken for a minimum of 8 hours, but brine for no longer than 48-hour
PIN IT FOR LATER

Love and gratitude,


I’ll trade my water kefir for some milk kefir. Lol. Yes, buttermilk is a good substitute. Great post, thanks for sharing.
I would keep both kinds of kefir if I could! I still need to get my hands on some water kefir grains…
Making this recipe today
Ingredients are 1 tsp kosher salt + 2 tsp sea salt. Do all 3 tsp get added to brine? Is so, is there a reasoning for using 2 different salts in the brine?
TYIA
Thank you for catching that! This is a mistake that I never caught. It’s supposed to be 1 tablespoon of kosher salt or 2 teaspoons of sea salt. I apologize for the confusion! If you did both, it won’t hurt your dinner 🙂