Buying and quartering a whole chicken is a lot more economical than picking up a couple of chicken breasts. When you make the switch from purchasing pieces to a whole bird, the question needs to be asked: How do I quarter a chicken?
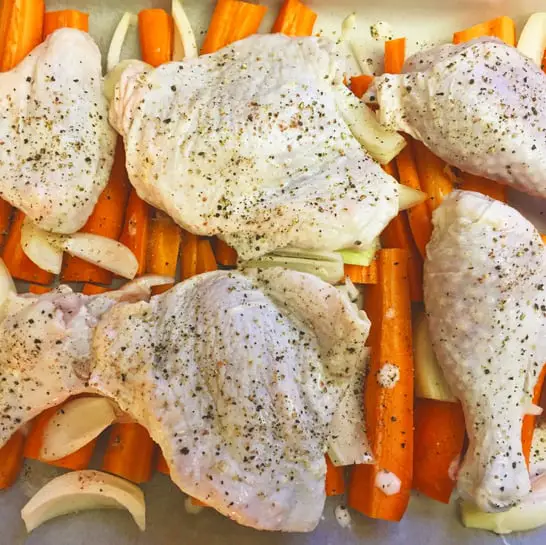
READY, SET, QUARTER
So you went to the grocery store and bought a whole chicken, now what?
First off, look at you, you savvy shopper! Buying a whole chicken is a much more economical option in the long run because you can get three or four meals out of it and you won’t need to buy chicken broth if you make your own.
There are so many options when you bring home a whole chicken.
One route to go is throwing it in a roaster with some veggies, herbs, and salt and pepper, like my paprika roast chicken recipe.
Another is to quarter up the bird for more meal variety and more flavourful stock. Let’s take a look at what we will need to get started.
HOW TO QUARTER A CHICKEN: THE VIDEO TUTORIAL
Written instructions are great, but sometimes what’s needed is a demo. Watch my all-time favourite method of quartering a chicken. If you like what you see, I hope you’ll subscribe to my YouTube channel!
This post may contain affiliate links, meaning that if you choose to purchase something after clicking on one of the links in this post, I may earn a small commission at no additional cost to you.
WHAT WILL I NEED TO QUARTER A CHICKEN?
There are only three tools you will need to begin:
A CUTTING BOARD
No one likes salmonella on their kitchen counter. Bring out the cutting board you have reserved for meat and roll up your sleeves. Here’s what I like using.
A GOOD, SHARP FILLETING KNIFE
Sharp is the keyword here.
When my husband, Big Papa, was quartering the chicken for the demo video, he didn’t sharpen the knife. It had been on the tip of my tongue to remind him, too!
Sharpening your knife before you get started will make your job easier and it will reduce your chances of injury. More people hurt themselves on dull knives than they do sharp ones. This is the knife sharpener I’ve been using for four or five years and I love it.
You will want to use a filleting knife for most of the quartering. The blade is thin and flexible, so it’s perfect for maneuvering around bones.
At some point, you will need a heavy-duty knife, like a chef knife or a cleaver to separate the drumstick from the thigh, but more on that later.
A CONTAINER
Once you starting removing pieces from the carcass, they will need a temporary home while you quarter the rest of the chicken. I usually use a large stainless steel bowl.
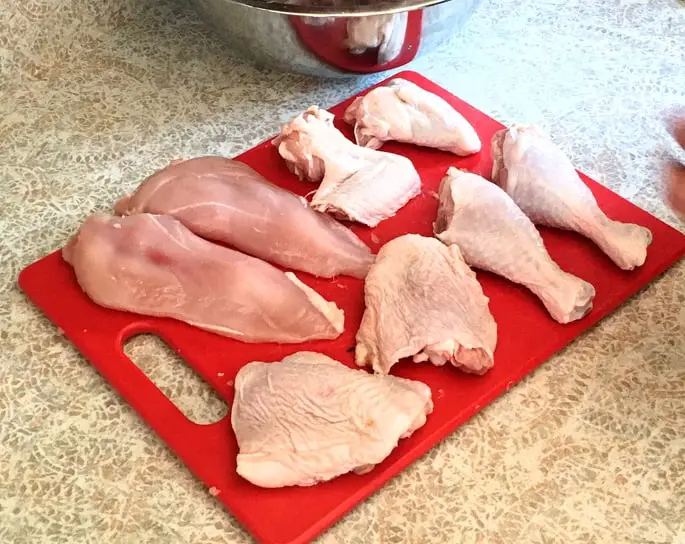
DISCLAIMER
I really hope you’re not squeamish because the following photos are going to show how to quarter a chicken. It’s not as bad when you’re actually doing the work, I promise! If you are squeamish, you might want to consider employing my favourite technique (watch the video!). Are you ready? We’re about to begin the lesson!
STEP ONE: REMOVE THE LEGS
This is where we begin our chicken quartering journey. Pick a side and find where the leg connects to the chicken. You will find connective skin, which you will slice open.
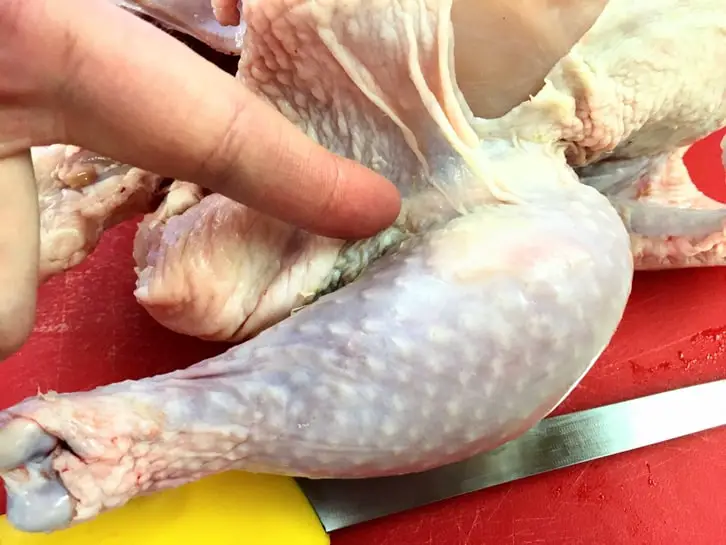
We will be slicing the skin open along here.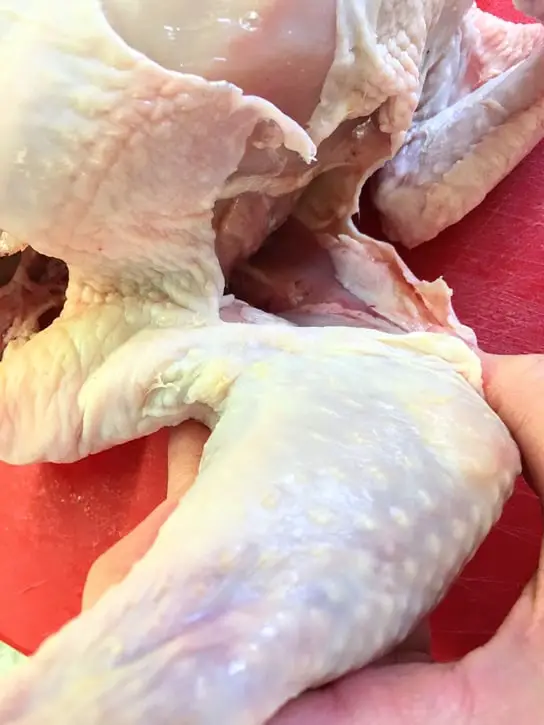
Sliced open and ready for the next step.The next thing you will want to do is pop out the hip bone by pulling on and slightly twisting the leg. You will feel the bone that connects it to the rest of the chicken. You will know you’ve succeeded when you hear and feel a pop.
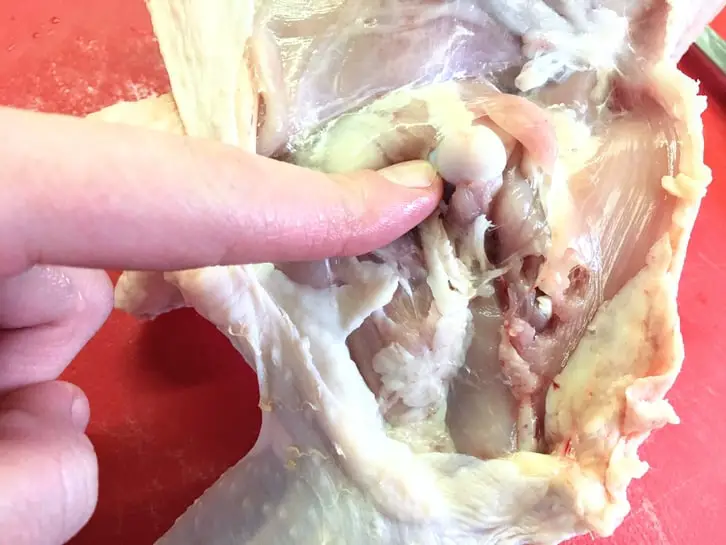
This is what success looks like. To separate the leg from the body, follow the muscle with the knife and cut above the bone. There might be a bit of finagling as there’s usually a pesky tendon in the way, but don’t let it boss you around.
If there’s a bit of meat left on the bone, don’t sweat it. It’ll only be a waste of you DON’T make a stock. You are going to make a stock, right?
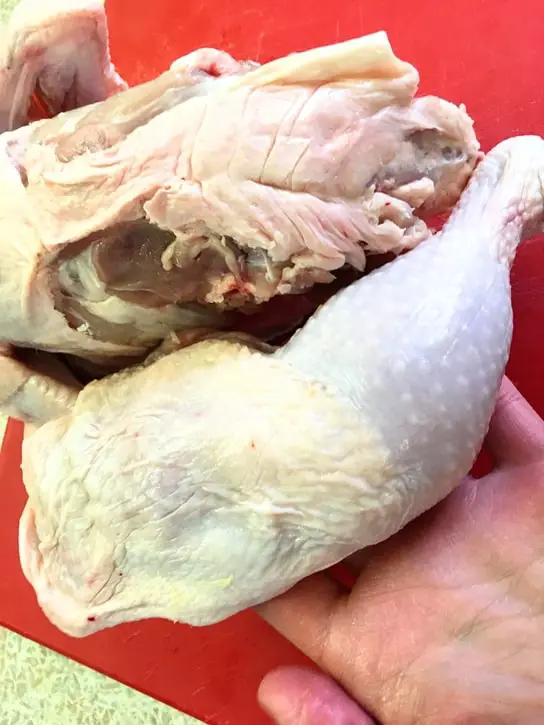
One leg done, another to go. Now that the first leg is off, toss your prize in the bowl or whatever you’re using for a container, and proceed to remove the other leg.
STEP TWO: REMOVE THE BREASTS
With the back of the bird facing up, locate the central bone of the back. This bone separates the two breasts and flares out a bit.
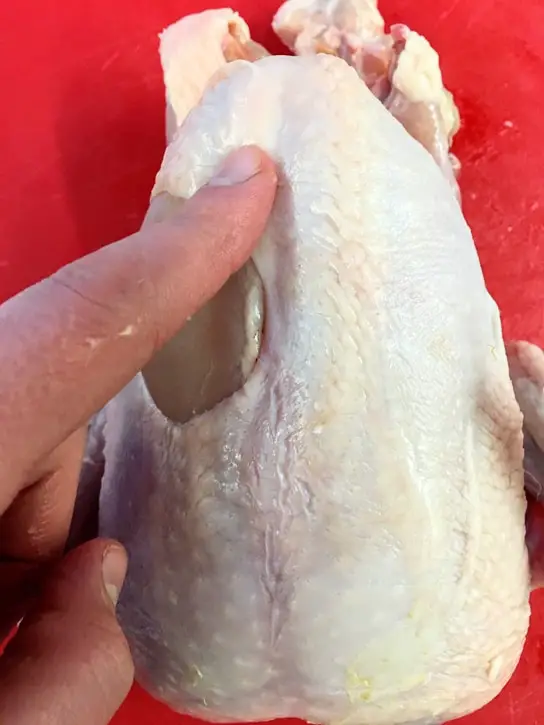
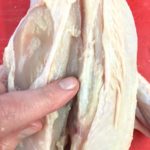
This is the backbone.Slit the skin alongside the bone. You should be able to see the bone once it’s slit.
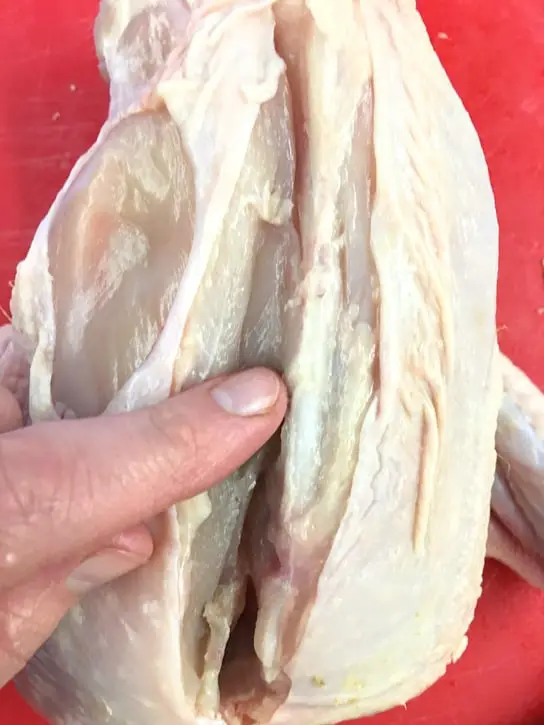
This white thing is the bone. Use your filleting knife to follow the bone, sliding it down along the backbone and cutting the meat free as you go. Because the back flares out a bit, you need to work your knife along that flared bone. It’s a combination of scraping and sliding the knife downward.
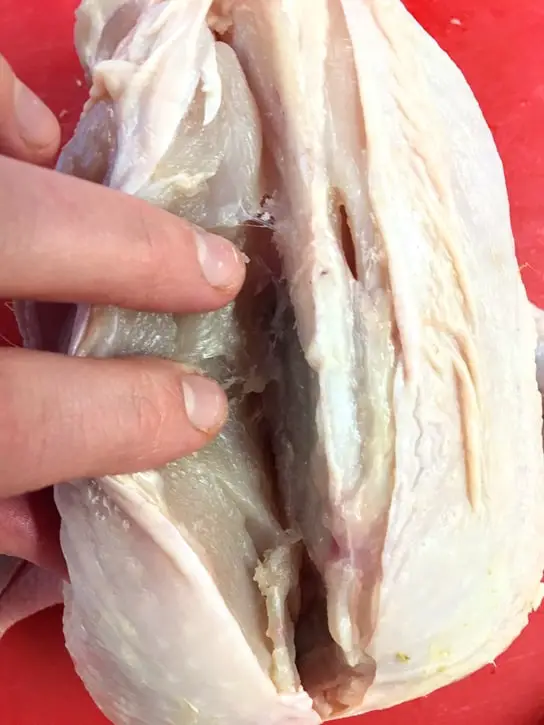
Can you see how the bone flares? Once you reach the end of the bone, you can begin the process of cutting the breast free. It’s a half cutting, half scraping maneuvre.
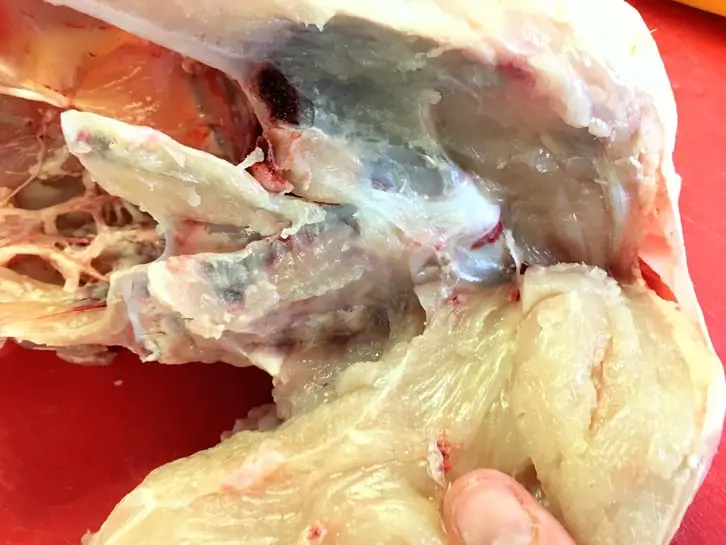
We're so close!Before we free the breast, we will pop the wing out of its socket as we did with the legs, then cut the breast free.
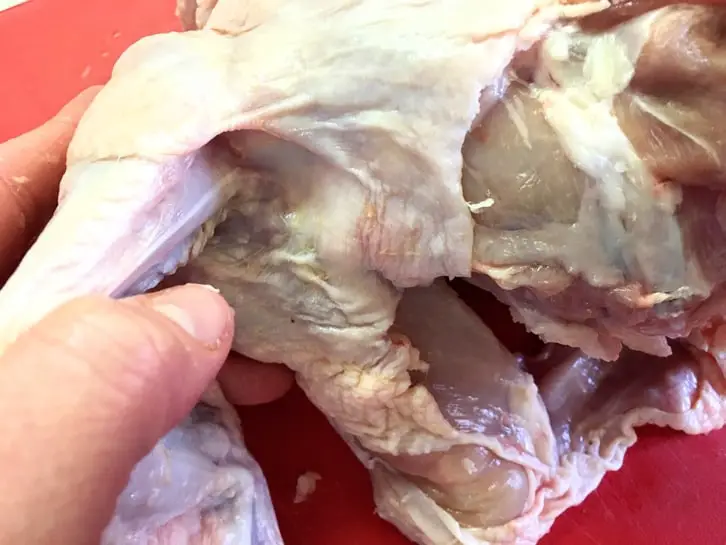
Give the wing a pull and a twist to dislocate it. Repeat on the other side! Once this is done, we can turn our chicken quarters into eighths.
SEPARATING THE WINGS FROM THE BREASTS
If you’re hoping to use a skinless chicken breast in an upcoming recipe like I am, this is the first thing you will want to do. Remove the skin through a combination of cutting at it with your knife and peeling it off.
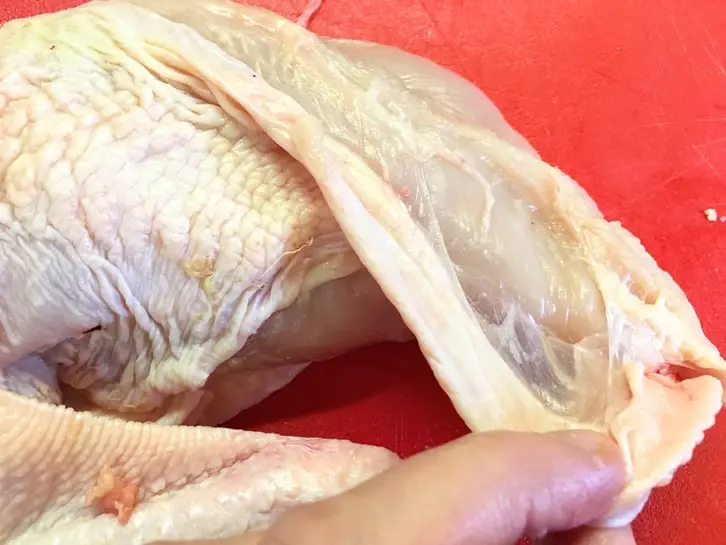
I will need to use my knife on this before I can peel off the skin. To remove the wing, cut above the same bone that was popped out earlier.
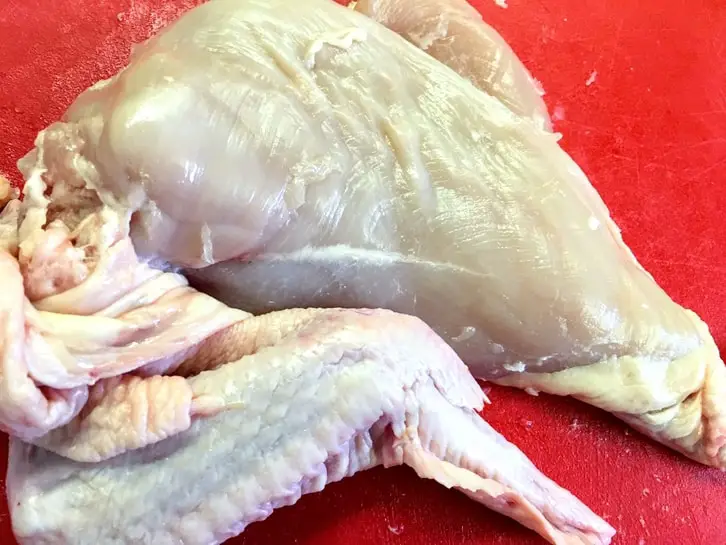
You will want to cut off the excess skin, too. Once the wing is removed, draw your attention to the wingtip.
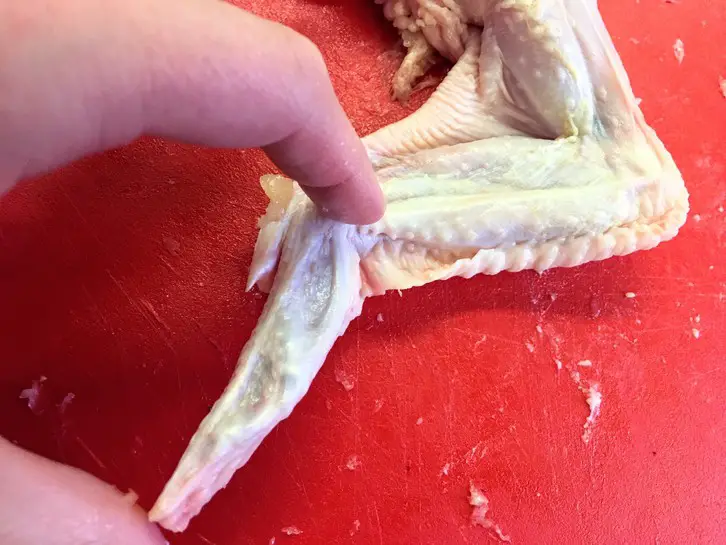
This bit is the wingtip.There’s no meat in the wingtip, but it’s perfect for the stock bag. To remove it, give it a bit of a twist to dislocate it a bit before cutting it off. That’s it. You have the option to split the wing if you so desire, which requires another pop and cut.
SEPARATING THE DRUMSTICKS FROM THE THIGHS
This is the stage in the quartering where you will want the big knife out. Begin by taking the thigh bone and follow it up to the drumstick to pop it out.
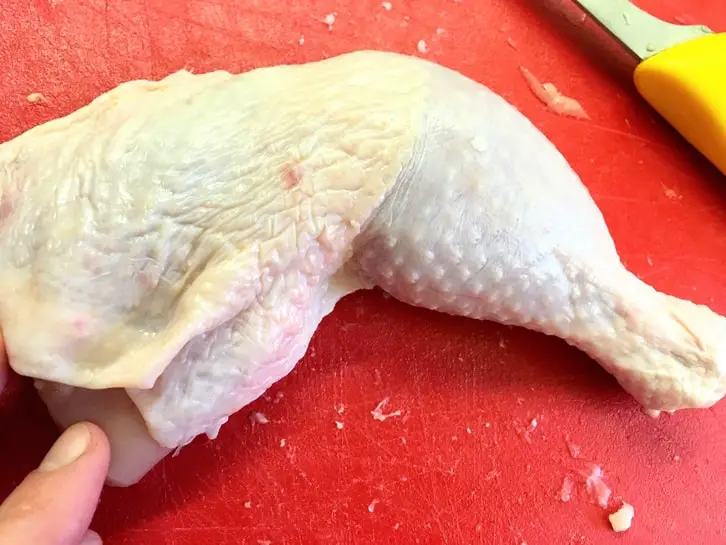
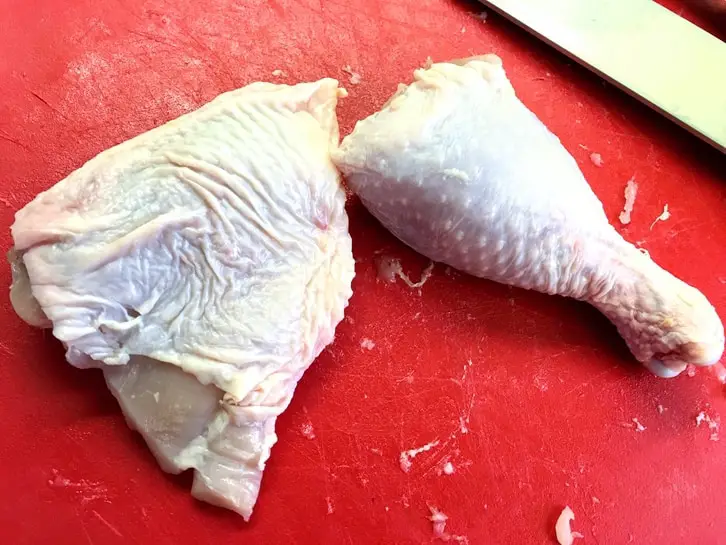
When the leg is popped out, find the bone and cut right above it to remove the drumstick. Don’t be shy about giving it a forceful chop.
DID YOU KNOW?
Once you learn how to quarter a chicken, you can do the same thing to other fowl. Ducks, turkeys and geese share a similar bone structure, so the same theory applies.
With practice, you will get increasingly comfortable with quartering a chicken. The first time is always a bit awkward and full of handwashing to reread or watch the instructions.
When you get the hang of it, quartering a chicken is something you can do in five minutes or less.
USING THE WHOLE BUFFALO
I have mentioned making stock several times now.
I’m a frugal gal, and most commercial stocks are full of nasty ingredients. They’re convenient, but that’s about it.
At any given time, I have a couple of freezer bags full of vegetable scraps, chicken, and other discards that I save up for making stock. If you’re new to the world of stock, learning how to make it from your kitchen scraps is the best place to start.
Lately, I’ve been exploring the exciting world of bone broth. I still use my scraps for this, but it’s a lot more intense because I’m making large batches that simmer overnight which leaves me scrambling for containers to store it in. The reward is worth the effort.
WHAT TO DO AFTER YOU QUARTER A CHICKEN
If you don’t have immediate plans for your chicken, store it in the fridge right away! If you do have plans, get some salt on that chicken before you transfer it to the fridge. Salt is the magic ingredient that brings the flavour out in chicken, but it also needs time to soak it up.
Marinades and brines are brilliant aids in achieving this aim. I have an awesome tequila lime marinade that I use when I’m making quesadillas. I’m also working on bringing a spectacular kefir brined chicken recipe your way soon. Don’t know what kefir is? Learn all about kefir here.
While you probably have ideas for your chicken, I certainly don’t have a shortage.
I love a good chicken pot pie, which is when knowing how to make a white sauce (a béchamel) comes in handy. I have recipes for this nestled in my recipes for cauliflower gratin and French ham and cheese melts.
Then there’s fried chicken and all the many ways to serve it up. Fried chicken and waffles, fried chicken mac & cheese, on salads, with biscuits and in sandwiches. What are you going to do with your chicken?
THANKS FOR DROPPING BY THE KITCHEN!
I hope this little tutorial on quartering a chicken has given you the confidence you need to give it a go yourself. If I can do it, so can you!
The video is quite helpful, so do check it out if you need a better visual. In any case, I hope you’ll let me know how it goes in the comments below!
SHOP THIS POST
OTHER POSTS TO EXPLORE
How to make broth from kitchen scraps
Tequila lime chicken quesadillas
PRINTABLE HOW TO QUARTER A CHICKEN CARD
How to Quarter a Whole Chicken
Equipment
- Cutting board
- Filleting knife
- Chef knife or cleaver
- Bowl for storing cuts
Instructions
Remove the legs:
- Start out by slitting the skin connecting the leg to the rest of the chicken.
- Pop out the hip bone by pulling on the leg. You will feel the bone that connects to the chicken, so pull them apart until you hear a “pop”.
- Once the leg has been dislocated, follow along the muscle with the knife and be sure to cut above the bone.
Remove the breasts:
- Find the central bone of the back (there’s a bone separating the two breasts).
- Slit the skin alongside the bone. You should be able to see the bone once it’s slit.
- Use your filleting knife to follow the bone, sliding it down along the backbone, cutting the meat free as you go.
- Because the back flares out a bit, you need to work your knife along that flared bone. It’s a combination of scraping and sliding the knife downward.
- Once you reach the end of the bone, you can begin the process of cutting the breast free. It’s a half cutting, half scraping maneuvre.
- Before we cut off the breast, we will pop the wing out of its socket as we did with the legs, then cut the breast free.
Separate the wings from the breasts.
- If you want skinless chicken breasts, remove the skin through a combination of making small slices with the knife and peeling.
- For the wing, cut above the same bone that was popped out earlier and cut the extra skin off.
- As for the wingtip, there's no meat in it, so remove it and use it for stock.
Separate the drumstick from the thigh.
- Take the thigh bone and follow it up to the drumstick to pop it out.
- When it’s dislocated, find the bone and cut right above it to remove the drumstick.
Notes
- When you’re cutting above the bone, there’s usually tendon that’s in the way, so it can sometimes take a bit of finagling.
- Unless planning on using it right away, freeze the carcass for homemade chicken stock.
PIN IT FOR LATER

Love and gratitude,



Leave a Reply