
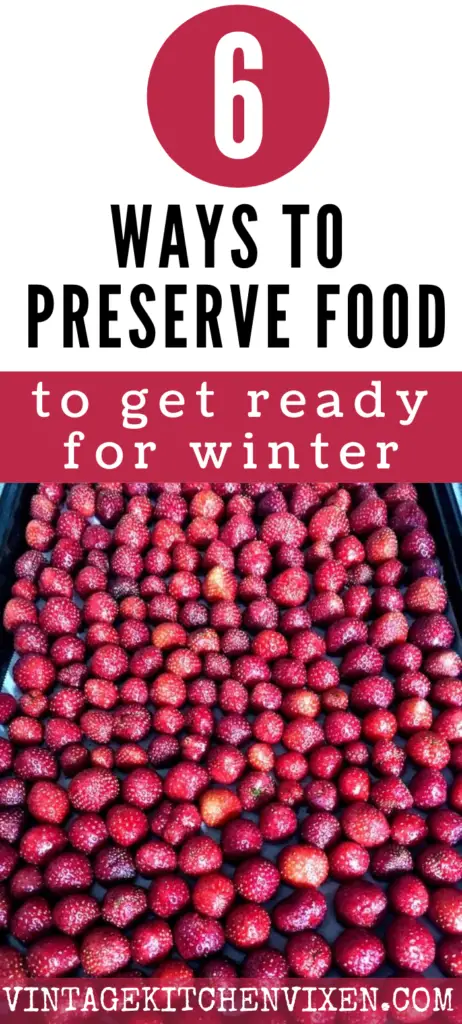
Do you hate grocery shopping as much as I do these days? Here’s how to preserve the summer harvest this fall. Let’s fill up that larder!
STOCKING UP THE PANTRY THE OLD-FASHIONED WAY
Once upon a time, grocery stores weren’t the primary destination to put a meal on the table.
Soup didn’t come out of a can, a helper didn’t come out of a box, and fast food had to be caught.
Families worked long and hard together to store up enough food to last them through the winter, and the majority of that supply was produced on their own land.
Before the dawn of modern refrigeration, almost every home had a root cellar or some sort of cold room to store their goods.
Potatoes, carrots, cabbages, and other hardy vegetables were carefully packed away.
There were bushels of apples, large crocks of homemade sauerkraut, and cured meats.
In the attic, there might be braids of onions and garlic and herbs hanging to dry for both culinary and medicinal purposes.
There’s something warm and cozy about having a full pantry, isn’t there?
While most of us don’t have cold rooms or root cellars anymore, we are fortunate to live in an age of abundance where we can get our hands on just about anything to preserve it.
That being said, it’s more important than ever to return to our self-sufficient roots and get ready for a long winter.
WATCH THE VIDEO
This video is more like a podcast, so you can tune in while you wash the dishes or tidy up the living room. If you dig my vintage style, be sure to subscribe to my YouTube channel for more vintage-inspired fun!
This post may contain affiliate links, meaning that if you choose to purchase something after clicking on one of the links in this post, I may earn a small commission at no additional cost to you.
RELATED: Old-Fashioned Bucket List Ideas for Fall
ARE YOU READY TO ROLL UP YOUR SLEEVES?
When I say we’re going to stock up our pantries, I’m not talking about buying stacks of frozen pizzas, cans of soup, and other heavily processed goods.
While I do have a post on what you should keep stocked in the pantry at all times, I’m talking about something more. I’m talking about preserving food.
Spoiler alert: preserving food is A LOT of work and requires time and dedication.
Unfortunately, the skill of food preservation is one of many old-fashioned skills that weren’t passed down in recent generations.
It’s never too late to learn, though!
THE ART OF FOOD PRESERVATION
There is something beautiful about opening up your cupboards to see rows of stewed tomatoes, apple sauces, jellies, pickles, dried fruit, and other preserves that you lovingly prepared yourself.
For me, it’s comforting to know that these homemade goods aren’t sitting in BPA-lined cans or made with questionable ingredients.
I’m the one who gets to control the salt and sugar, not a packaged goods food giant.
When it comes to food preservation, canning may be the first method that comes to mind, but it’s also one of the most intimidating (especially once you venture into pressure canning).
No matter the method, preserving food takes work, but I’d much rather put in the time and effort than venture out to a grocery store these days, wouldn’t you?
Here are the methods we’ll be looking at:
CanningDehydratingFermentingFreezingCuring and Smoking
Before we start preserving though, we need to source our food. Here’s where to look.
SOURCING FOOD TO PRESERVE
When I’m gathering materials to preserve, the grocery store isn’t my first choice unless there are crazy deals that I want to jump in on.
I’m one of those folks who likes scouring the flyers each week for bargain produce, and when a five-pound bag of beets shows up on sale for $2.50 a pop, I’ll grab two.
What can I say? They make great pickles!
I’m also a sucker for a good roasted beet salad and steaming bowls of borscht.
I digress.
Here are my go-to sources for produce when the harvest rolls in.
THE VICTORY GARDEN
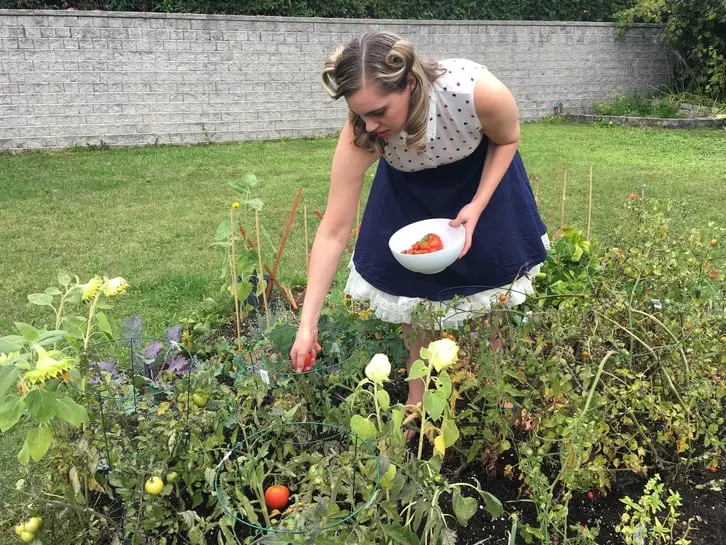
I’m the Vintage Kitchen Vixen. I have a tendency to call my vegetable patch a victory garden for the reasons I lay out in my modern victory garden post.
The garden is the first place I turn to when I start preserving the harvest.
Like many, I don’t have a lot of space to work with, so I make do with what I have.
My goal is to be able to feed my family during the winter off of my garden harvest, but I’m not there yet.
I still have a whole lot of lawn to transform into an edible landscape.
To supplement, the next place I’ll turn to is the…
THE FARMER’S MARKET
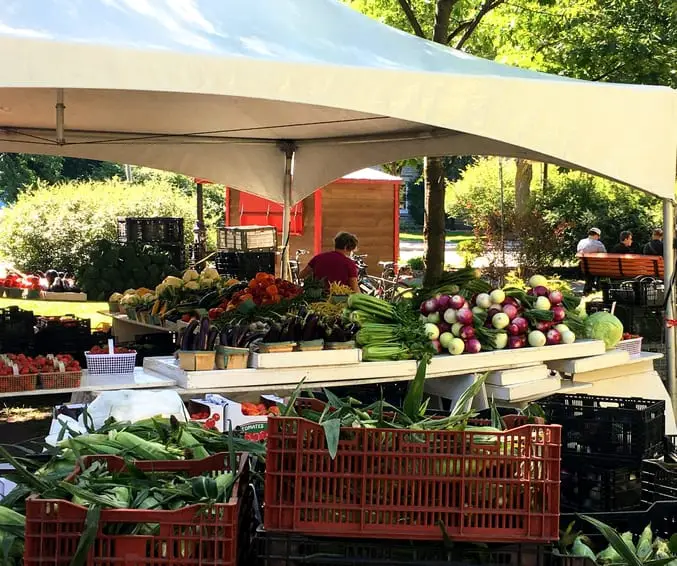
There’s nothing like a farmer’s market during the harvest season.
There’s just so much to see! Mounds of beautiful cabbages begging to become sauerkraut; rainbow coloured carrots; huge bags of corn, and strings of dried chilli peppers.
Not to mention all the artisan products, like soaps, candles, and preserves!
What I love about farmer’s markets is that a lot of the produce is organic and you’re often able to find out when the produce was harvested.
Depending on your local market, you might be able to get your hands on a whole bushel of tomatoes, apples, pickling cucumbers and beans.
If you have to take public transit to get there, that makes it trickier to bring home a half dozen sugar pumpkins, but call a friend and share the wealth!
Maybe you’ll be able to rope them into a preservation party.
After all, many hands make light work!
THE FARM
If you have the means to drive around, taking a trip to the farm makes a fun weekend outing.
A lot of farms have U-Pick available where, depending on the season, you can load up on fresh berries, peaches, and apples.
Some farms also offer attractions and activities for families to enjoy, so while you might go there for the sole purpose of going home with a few bushels of produce, the kids can enjoy the petting zoo or corn maze.
A quick search online will show you what’s available in your area and what the local farms have to offer.
ROADSIDE PRODUCE STANDS
These are easier to find in rural areas and don’t usually offer bulk quantities.
That being said, it doesn’t hurt to ask the person running the show to see if you can strike up a deal!
PRODUCE SWAP PARTIES
This is a creative way to get your hands on produce for the purpose of preserving.
Round up a couple of friends who want to participate and buy large quantities of produce together to divvy up later.
Or gather your fellow gardeners to make a few produce trades.
If you’re able to get their help with the preserving part, that’s a bonus!
WAYS TO STOCK UP THE PANTRY
Now that we know where to go for the freshest produce, let’s take a look at what we can do with it.
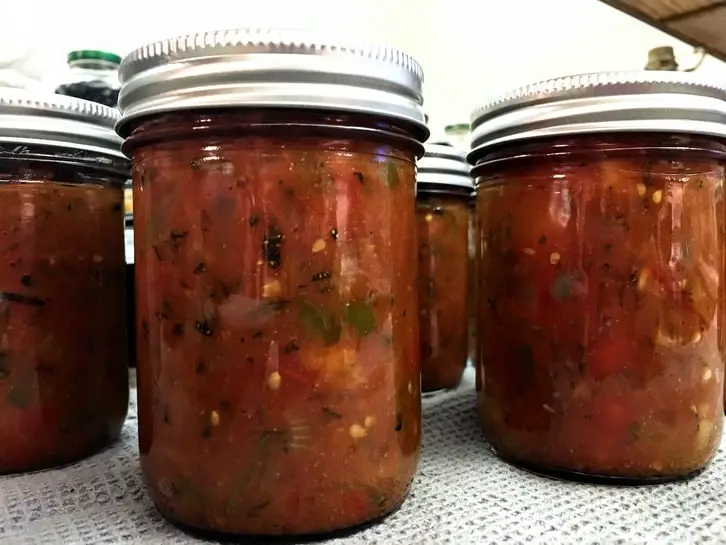
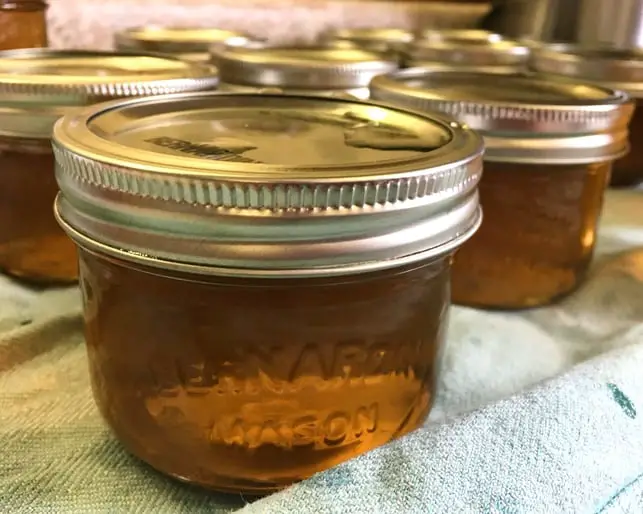
CANNING
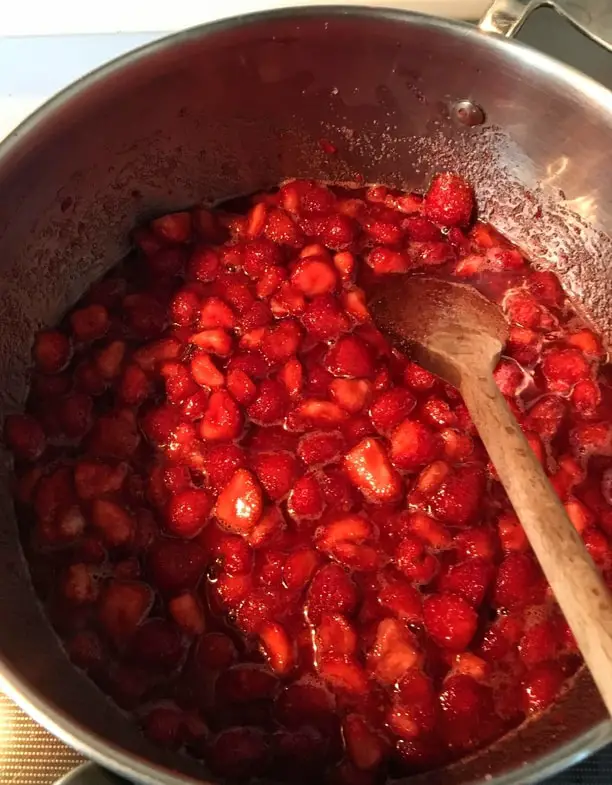
Out of all of the preservation methods, we’ll be looking at, canning requires the most work AND supplies.
It’s also one of the most rewarding when all the work is done.
There’s something to be said for having a dozen jars of beautifully ripe peaches or pears floating in syrup waiting in your cupboard for an easy dessert.
In addition to all of the labour that goes into prepping the fruit and vegetables, you also need to transform them into a sauce, salsa, chutney or pickles.
There’s also the matter of sterilizing the jars, filling them, making sure they’re clean and free of air bubbles, and then processing them in either a water bath or with pressure.
On that note, it’s important to know how your canned goods need to be processed.
Alkaline vegetables like green beans need to be pressure canned to avoid risking botulism.
WHAT YOU’LL NEED
The main reason I put off learning to can for the longest time was the investment in the supplies.
At the time I didn’t realize I could get lucky finding canners, mason jars, and the accessories at thrift stores and yard sales.
I never thought to ask if I could borrow my mother’s canner, or slowly accumulate a flat of jars here and a flat of jars there.
Buying everything all at once, brand new costs a pretty penny, but making small purchases throughout the year leading up to the harvest season helps spread out the expense.
Another thing you might want is a preserving recipe book, like Ball’s Complete Book of Home Preserving, to help guide you through the process.
Mind you, there are plenty of resources online!
I’ve included some links below to inspire you.
CANNING INSPIRATION
Candied Jalapeños (Cowboy Candy)
How to Pressure Can Green Beans
DEHYDRATING
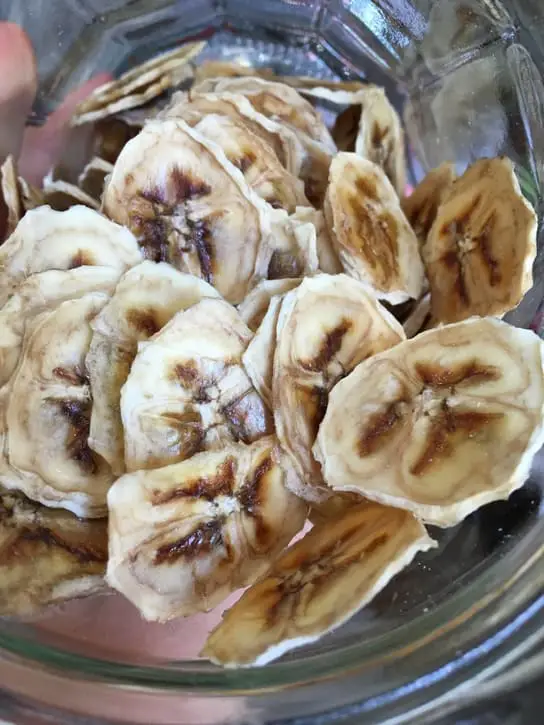
Dehydrating is one of the easiest ways to squirrel food away, plus, dehydrated foods are so darn convenient!
They are the number one food to have on hand in case of an emergency.
RELATED: How to Prepare for an Emergency
Because dehydrated foods shrink down in size due to moisture loss (which is why they’re so resilient) they don’t take up much storage space.
There’s also the added benefit that they retain most of the vitamins, minerals and enzymes that they have in their raw state. U
nless you choose to eat the food as-is, it’s simply a matter of soaking the produce in boiling water for 15-minutes to plump them back up.
Easy peasy.
WHAT YOU’LL NEED
A basic dehydrator doesn’t cost very much, and apart from air-tight containers, you won’t need anything else to get started.
Some of my favourite things to dehydrate include bananas, apples, zucchini, herbs, kale, tomatoes, and kiwis.
You can even make your own jerky using a dehydrator!
DEHYDRATING INSPIRATION
Getting Started with Dehydrating
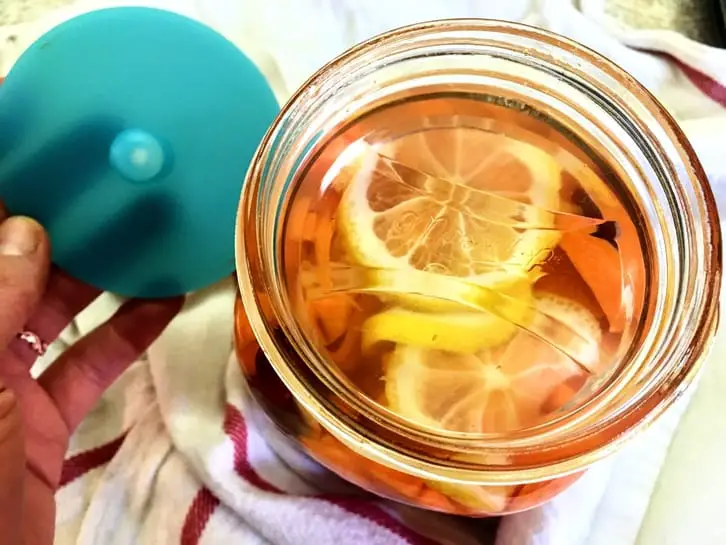
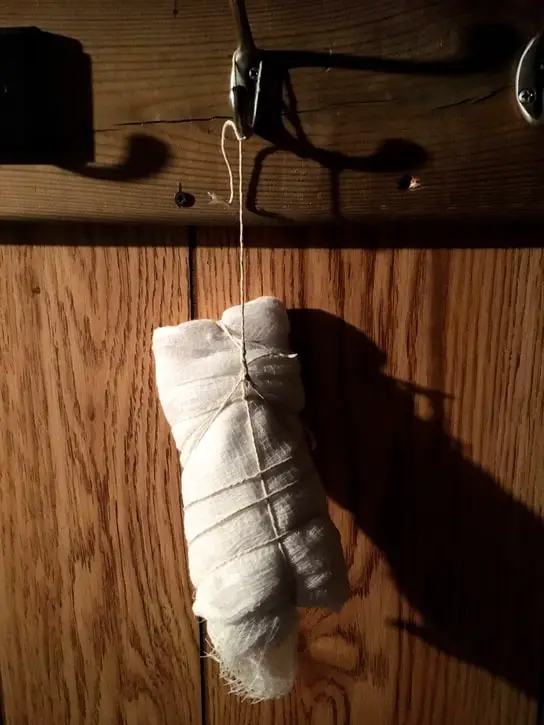
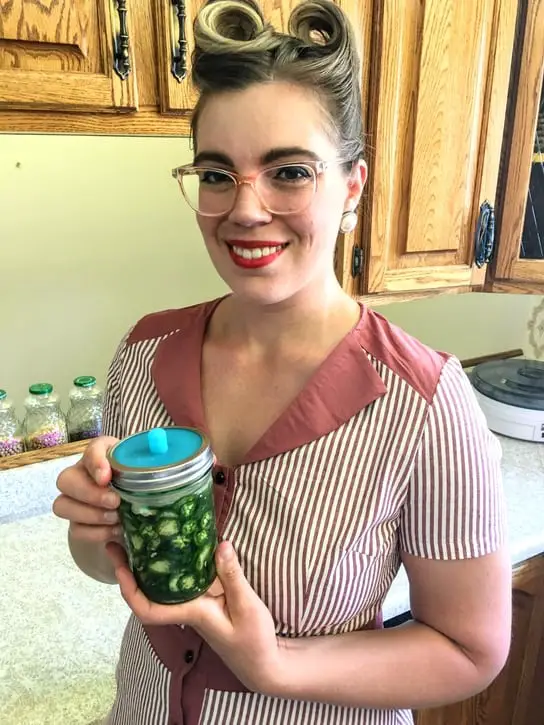
FERMENTING

Of all the preservation methods, fermenting is my favourite because it makes me feel like an alchemist.
Like canning, I was intimidated by the idea of fermenting for the longest time until I finally rolled up my sleeves and made my first batch of sauerkraut.
I’ve been hooked ever since.
RELATED: How to Make Sauerkraut
Fermentation is a simple process that keeps veggies fresh for up to a year in a raw state.
Fermented foods are teeming with probiotics, which are essential for gut health.
Fermentation also boosts the vitamin and mineral profile of fruit and vegetables, making them even more powerful than in their original raw state.
Moreover, fermented foods are rich in vitamin K2, which is something most of us don’t get enough of in our diets.
The downside?
Once they’re ready, fermented foods need to be kept refridgerated to slow down fermentation.
This takes up fridge space, so having a cold room or a second fridge comes in handy when you get bit by the fermentation bug and want to ferment everything.
RELATED: Fermented Carrot Sticks
RELATED: Fermented Jalapeños
WHAT YOU’LL NEED
It doesn’t take very much to get started with fermenting.
In my sauerkraut recipe post, I walk you through how to get started without any fancy equipment.
If fermenting is something you want to get serious about, I recommend picking up a kit like this Masontops one which includes airlock lids, glass weights and a vegetable tamper.
For larger batches, a half-gallon or full gallon jar comes in handy, or a fermenting crock.
Alternatively, you can use quart-sized mason jars if you’re not ready to invest in fermentation vessels.
Lastly, you will want to use a good mineral-rich salt that is free of additives (like anti-caking agents).
This Celtic Sea Salt by Selina Naturally is my favourite.
FERMENTING INSPIRATION
FREEZING

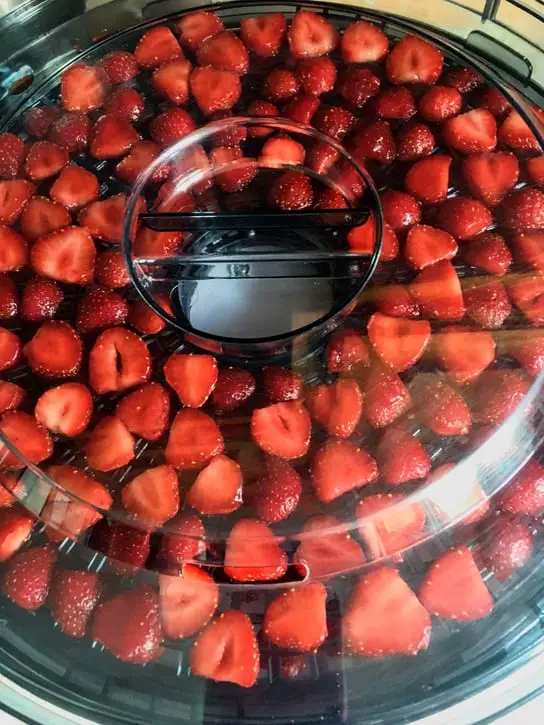
If you’re lucky enough to have the freezer space, freezing is an excellent route to go.
When freezing, blanching is an important first step that will extend shelf-life and help vegetables to retain their colour.
Delicate fruits, like strawberries, don’t need this treatment but do freeze them on a tray prior to storing them in a bag, otherwise you’ll wind up with a frozen clump.
Make sure to use freezer bags, or better yet, a vacuum sealer to avoid freezer burn!
While freezing is easy to do, there is a major downside to it.
For one, it’s easy for items to get lost in the freezer and forgotten about.
This is why labelling everything with the item within and its packaging date is so important!
Secondly, what happens if the power goes out?
Folks have lost thousands of dollars worth of food because they didn’t have a power generator to keep their freezer going during a time of crisis.
Just something to keep in mind…
CURING AND SMOKING
The last method I’m going to mention here is curing and smoking.
This method does not apply to produce, but to meat.
It is mostly meant for the hunters and homesteaders out there to consider an avenue that doesn’t involve freezing.
This is an age-old tradition to preserve meat by using salt or smoke to kill the bacteria that would cause it to spoil.
I don’t know a ton about curing meat, but I do enjoy salt curing duck breast from time to time to make homemade prosciutto for a charcuterie board.
There is a ton of information on this subject floating around the interwebs that will help you on your way if you wish to dabble.
One book I can recommend is Charcuterie: the Craft of Salting, Smoking and Curing by Michael Ruhlman and Brian Polcyn, which includes recipes for dry-cured meats, patés, smoked fish, bacon and sausages.
A LITTLE INSPIRATION
THINGS TO KEEP IN MIND
It’s easy to feel overwhelmed when you first get started with preserving.
Begin with what what feels most comfortable, whether that’s freezing, canning or dehydrating, then build up your skills from there.
It doesn’t make sense to buy produce in bulk that you don’t like just because there’s a great deal.
Instead, work with produce you go through a lot of.
If you’re constantly buying frozen corn, crushed tomatoes or apple sauce throughout the year, start with those.
Many hands make light work.
Try getting your family involved in the process. Invite a couple of friends over and dedicate a weekend to getting the kitchen steamy with a bubbling canner.
Share the love.
Lastly, if you’re short on storage space, start with dehydrating.
THANKS FOR DROPPING BY THE KITCHEN!
I’m going to say it again. Stocking up your pantry during the harvest season takes a whole lot of work, which is why a lot of people don’t do it.
With full-time work, energetic kids, and the other areas that make life full, it’s hard to make space and time for something we’ve been relying on grocery stores for nearly a century.
When your cupboards, freezer, and fridge are flush with high-quality preserves though, you won’t be sorry you rolled up those sleeves!
BOOK RECOMMENDATIONS FOR GETTING STARTED
Ball Complete Book of Food Preservation
Wild Fermentation by Sandor Ellix Katz
Fermented Vegetables by Kirsten and Christopher Shockey
Charcuterie: The Craft of Salting, Smoking and Curing by Michael Ruhlman and Brian Polcyn
THINGS YOU MIGHT NEED TO GET STARTED
Basic Dehydrator (this one is great for beginners and is the one I use)
Half-Gallon or Gallon Glass Fermenting Jar
PIN IT FOR LATER

Hi Sylvia,
have you given up on your Bitchute account? That would be a shame as there are many who do not (and refuse to) visit youtube.
Hope to see your new video’s on Bitchute.
Greetings, Jan
Hi Jan, thank you for reaching out! I have not given up on Bitchute. I took a bit of a breather because I’ve been so busy with preserving food that I’ve been too tuckered out to work on new content. Youtube is supposed to mirror over to Bitchute, but it’s so unreliable and can take days to show up if I don’t do it manually. I’ll go post the latest video now 🙂
Hi Sylvia,
I did not expect such a quick response. Thank you for posting your video. Lately I’ve been stocking my larder so your video is very interesting and helpful.
Greetings, Jan